Hello to all computer enthusiasts! Today, we’re going to talk about installing Jupyter in a virtual environment (Virtualenv) on the Windows Subsystem for Linux (WSL) Ubuntu. This may seem like a complex topic, but with the right instructions, it’s actually quite simple. So, let’s get started!
Prerequisites
Before we begin, make sure you have installed the Windows Subsystem for Linux (WSL) with Ubuntu. If you haven’t done so yet, you can follow Microsoft’s official instructions [here](https://docs.microsoft.com/en-us/windows/wsl/install).
Step 1: Installing Python and Virtualenv
First, we need to ensure that Python is installed. Open your Ubuntu WSL terminal and type the following command:
This will update your system and install Python3 and Pip3, the Python package manager.
Next, we’re going to install Virtualenv, a tool for creating isolated Python environments. Type the following command in your terminal:
Step 2: Creating a Virtual Environment
Now that we have Virtualenv, we can create a new virtual environment. In your terminal, navigate to where you want to create the environment, then type:
You should now see “(venv)” in front of your command prompt, indicating that the environment is active.
You should now see “(venv)” in front of your command prompt, indicating that the environment is active.
Step 3: Installing Jupyter
With our virtual environment active, we can now install Jupyter. Simply type the following command:
This will install Jupyter in your virtual environment.
Step 4: Launching Jupyter Notebook
Now that Jupyter is installed, you can launch a Jupyter notebook by typing:
This should launch Jupyter Notebook in your default browser. If it doesn’t, copy the URL displayed in the console and paste it into your browser.
Step 5: Testing the Jupyter Notebook
After launching Jupyter Notebook, you should see a user interface in your browser. To create a new notebook, click on the “New” button in the top right and select “Python 3” (or the version of Python you have installed) under the “Notebook” option.
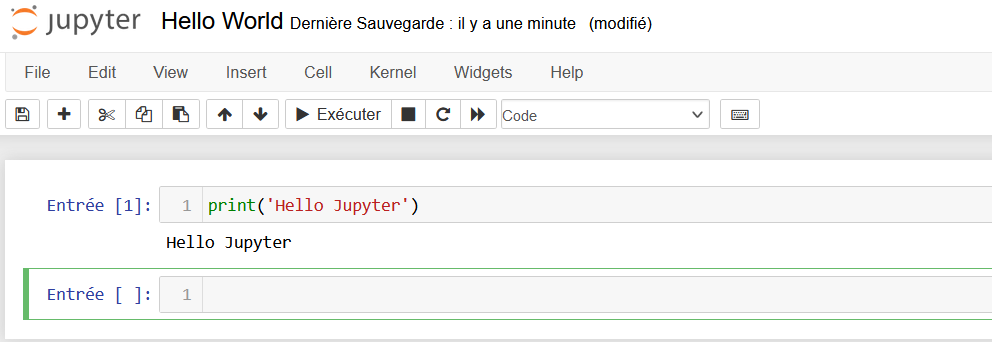
A new tab will open with a blank notebook. You’ll see an empty cell where you can start writing Python code. To test your installation, let’s try writing a simple Python script.
In the first cell, type the following code:
Then, execute the cell by clicking on the “Run” button in the menu bar or by pressing Shift+Enter. You should see the message “Hello, Jupyter!” appear below the cell. If so, congratulations! Your Jupyter notebook is working correctly.
If you encounter any problems, make sure your virtual environment is activated and that Jupyter is properly installed. If you continue to have problems, feel free to leave a comment and we will do our best to help you.
“`
Then, execute the cell by clicking on the “Run” button in the menu bar or by pressing Shift+Enter. You should see the message “Hello, Jupyter!” appear below the cell. If so, congratulations! Your Jupyter notebook is working correctly.
If you encounter any problems, make sure your virtual environment is activated and that Jupyter is properly installed. If you continue to have problems, feel free to leave a comment and we will do our best to help you.
Remember, Jupyter Notebook is a powerful tool for data exploration, machine learning, statistical analysis, and much more. Enjoy your new Jupyter development environment!